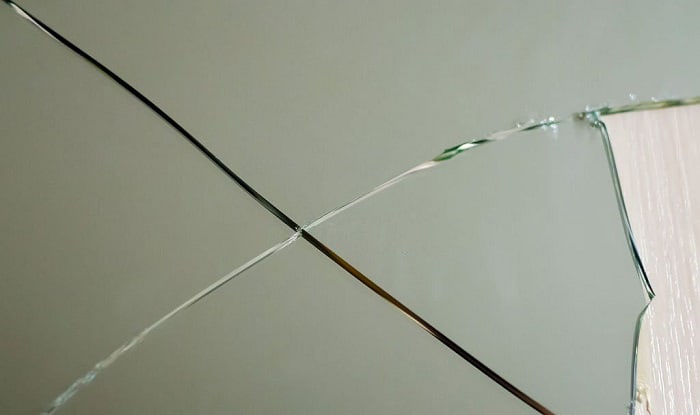
Whether you believe in the superstition that a broken mirror equals seven years of bad luck, there’s no denying that dealing with one can be troublesome.
Although it might not render the mirror unusable, the web of hairline fractures can still be unpleasant to notice.
Fortunately, as long as the damage isn’t too severe, you can repair the cracks and make the mirrors look as good as new. In this DIY guide, I’ll show you how to fix a broken mirror in a few easy steps.
Table of Contents
Foolproof Methods For Cracked Mirror Repair
Fixing a broken mirror is quite simple. Most items required for a mirror repair kit are everyday items you can find at home.
#1: Cover The Cracks With Resin
The most common way to deal with broken mirrors is to fill the cracks with epoxy resin. To repair a broken mirror this way, you can grab a standard windshield repair kit, which can be found at any local auto supply store.
What To Prepare
- Epoxy resin adhesive
- A stabilizer film
- A curing film square
- A pair of gloves
- A clean razor blade/a utility knife
- A putty knife
- Glass cleaner
- A clean cotton towel (or a microfiber cloth)
- Liquid soap (dish soap, hand wash liquid soap, etc.…)
Step-by-Step Instruction
Step 1: Ensure Your Mirror’s Entire Surface Is Spotless
Before getting to business, you must ensure your mirror is 100% clean. This will prevent the epoxy from trapping the dirt when you apply the adhesive to the mirror.
Mix a few drops of liquid soap with a bowl of warm water. Rinse the towel with this solution and use the cloth to remove dirt from the mirror’s every nook and cranny.
Throw away any loose glass bits you encounter.
Step 2: Get The Stabilizer Film Ready
A stabilizer film is necessary for making the loose fragments stay in place. Estimate how many you’ll need based on the rule of thumb that the films should be touching one another.
You should peel off its adhesive backing when you’re about to apply the stabilizer film to the mirror.
Gently remove the backing and be careful not to accidentally let the film stick to other surfaces or to itself, which affects its adhesion quality.
Step 3: Apply The Stabilizer Film To The Cracks
Determine where you want to apply the stabilizer to minimize the chances of you having to remove and reapply it.
Carefully and slowly lay down the film’s corner onto the mirror’s surface. Then, smooth down the film until it completely covers the cracks.
Ideally, there should be no air bubbles trapped beneath the film.
Suppose a few bubbles don’t manage to escape. In that case, you can easily rectify the issue by smoothing the film with your fingertip or an old bank card until all air diffuses.
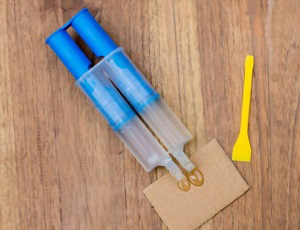
Step 4: Prepare The Epoxy Resin Adhesive
Depending on the specific type of mirror repair kit, the epoxy resin adhesive might arrive in different containers.
If your resin container already has a nozzle tip, then there’s no need to transfer the adhesive to a plastic syringe.
In most cases, however, you’ll need to use a plastic syringe to accurately and conveniently fill the crack with resin. Should your kit have neither the applicator tip nor the syringe, you can find them online or in department stores.
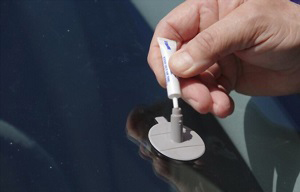
Step 5: Fill The Cracks With Epoxy Resin
- Slip the tip of the syringe into the center of the stabilizer film until it’s inside the crack.
- Slowly push down the plunger, so the resin fills in the gap. Refrain from cramming too much epoxy at once; otherwise, protruding lumps will form under the film.
- Repeat the process until all the gaps are filled.
- Then, use your fingers to press the stabilizer film’s surface to make sure the resin can set into the crack.
- Wait for the resin to dry
Depending on the resin you use, the waiting time for the adhesive to dry can range from 10 to 40 minutes.
On average, 20 minutes should suffice. Touching the epoxy can also help you tell if it’s set or not.
Step 6: Remove The Stabilizer Film For Curing
Once the epoxy has hardened, smoothly pull off the stabilizer film.
- While you can rely on a putty knife, utility knife, or razor blade to make it easier to lift off the film, don’t use too much force, which can leave tiny bits of the film behind.
- Apply a bean-size amount of resin over the filled crack and cover it with a curing film.
- Repeat this process for each curing film necessary to cover the shattered glass.
- Leave the mirror for 1 hour so that the resin can cure.
Step 7: Scrape Off Any Excess Resin
Slowly pull off the curing film.
- Put on gloves to protect your hands as you scrape off the excess resin from the mirror’s surface with a razor blade.
- Position the blade until it’s parallel with the glass to make the process smoother.
In this step, it’s essential that you don’t use too much force. Pay close attention to the mirror as you run the sharp blade across the new mirror surface, or else you might scratch and damage the glass again.
Step 8: Clean The Mirror
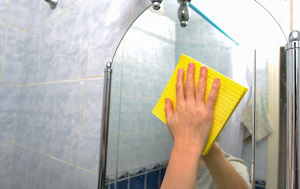
Spray glass cleaner onto the mirror and use another clean cloth to clean the mirror again.
Scrub the glass in circular motions until the mirror looks good as new. Voila, it’s time to behold the results before and after the change of your handy work.
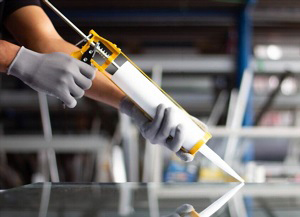
#2: Using Mirror Paint
In case the damage is beyond repair, but you still want to keep the mirror frame due to sentimental value, you can rely on some mirror silvering. Here’s how you can get brand-new mirrors with a re-silver kit.
What To Prepare
- Mirror paint
- Plexiglass
- A pair of cut-resistant gloves
- Glass cleaner
- Acetone
Step-by-Step Instruction
Step 1: Remove The Broken Pieces From The Frame
Lay the mirror upside down on a flat surface. Remove the backing panel from the frame and set it aside. Wear a pair of cut-resistant gloves to prevent accidents as you remove the sharp, broken mirror pieces.
Note: There will be a protective layer of brown paper for antique mirrors. You can cut it with a razor blade to reveal the silver backing.
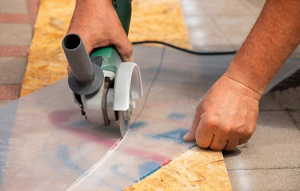
Step 2: Prepare The Plexiglass
Typically, I’d recommend having your Plexiglass pre-cut by the seller. It’ll save you a lot of hard work. However, if the mirror shape is relatively simple, you can do it yourself.
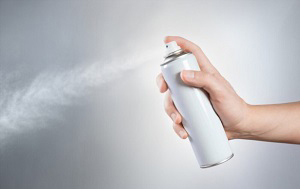
Step 3: Spray The Plexiglass With Mirror Backing Paint
- Give the spray can a few shakes before applying a fine coating onto the glass.
- Once you’ve covered the glass’ entire surface, give the paint layer 1-2 minutes to dry.
- Do this four more times to form a shiny silver backing.
You might need more than one can of mirror paint for large mirrors. Remember that you’ll need five layers of silver backing to work. You can also add a layer of opaque material to the paint to ensure the mirror is non-transparent.
Step 4: Assemble The Entire Mirror
- Put the new mirror back into the frame and flip it right-side up.
- Wipe the Plexiglass with acetone to peel away the film on the glass to make it shinier.
- Finally, clean the mirror one more time with a glass cleaner to remove any smudges.
#3: Disguise The Fractures

What if you have an antique mirror you can’t bear to throw away? If the crack is not that severe, there are ways to hide the imperfections!
- If the cracked area is on the mirror’s side edges, hide them behind curtains. This will make your mirror feel like a window leading to another world rather than a defective decoration.
- Use a mirror border to hide unsightly lines around the glass edges.
- Disguise a cracked mirror with a painted design to conceal the jagged lines.
- Cover the small cracks with flower vases. This will brighten up the room and draw the attention away from what you’re trying to hide.
- Glue decorative glass along the broken glass transforms the mirror into a unique accessory. Likewise, you can utilize stickers to cover cracked mirrors.
FAQs
How Do Mirrors Get Cracked?
If yours crack for seemingly no reason, the underlying cause might be stress. A warped frame, for example, can be a point of stress leading to cracks. There might also be an invisible crack that gradually worsens due to gravitational pull.
Another possible reason for cracked areas is a drastic change in temperatures and humidity. Bathroom mirrors, which are usually subjected to constant changes in humidity and temperatures, might be more likely to crack.
What Kind of Glass Cracks Can Be Repaired?
Other than mirrors, some types of repairable glass cracks include glass tile, single-pane windows, door sidelines, door glass, as well as picture glass.
Can You Fix A Cracked Mirror With Toothpaste?
Toothpaste is only efficient when dealing with minor scratches. A crack, on the other hand, cannot be remedied with simply toothpaste. You need to fix the mirror immediately by other means; otherwise, the damage will worsen over time.
How Much Does It Cost To Fix A Cracked Mirror?
This depends on whether you only require a mirror repair kit or have to replace the whole mirror glass. If it’s the former, then it’ll cost you less than $20. However, to replace a big mirror glass, you’re expected to spend $10-$20 for every square foot.
For mirrors on a car, the expense for repairs near me averages about $300, including the fee for the mirror itself and the labor cost. It might be cheaper if you pick used parts, whose price varies within the $30-$150 range.
What To Do With Broken Mirrors?
Repurpose your broken mirrors by turning the broken pieces into a jewelry organizer. It’s also a good idea to glue the large pieces to the wall as decorations. You can paint the fragments to jazz up your furniture as well. The possibilities are endless.
Conclusion
When it comes to how to fix a broken mirror, there are two main ways: applying resin and using mirror paint. If the damage is not that extensive, a good temporary solution is to disguise the cracks.
That’s the end of my guide for fixing broken mirrors. If the information proves helpful, don’t forget to share the article with those in need.

Hi, I am Roseanne Jones, an aspiring home designer that wants to make you feel more at home with your new house.With nearly five years of redecorating old residents and arranging new ones, I am confident that I can give you the best advice on your lovely place.