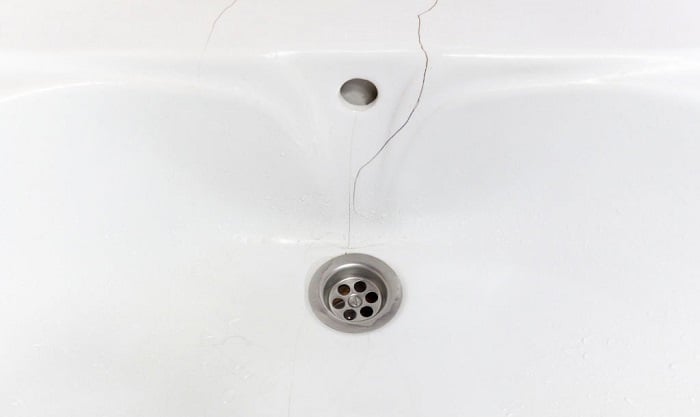
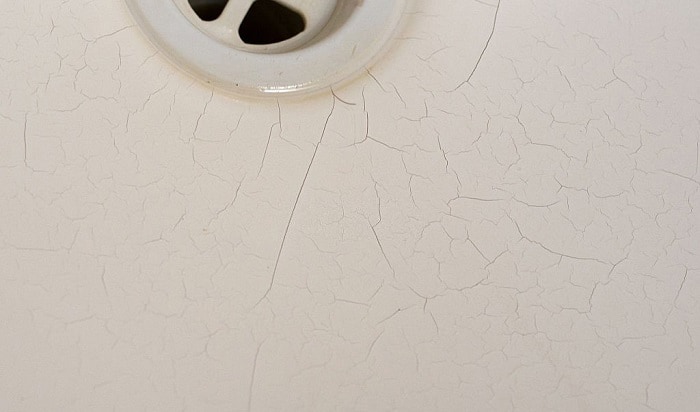
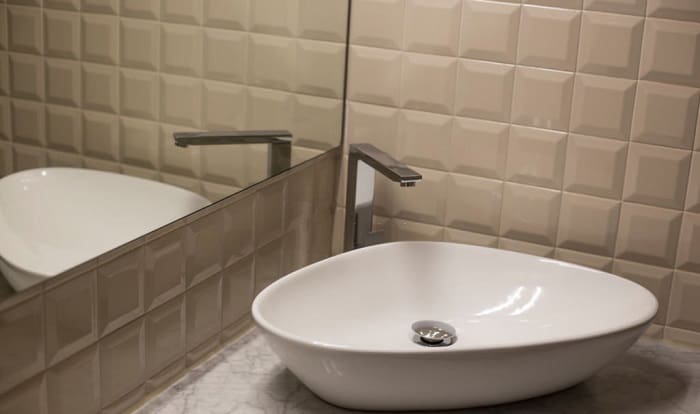
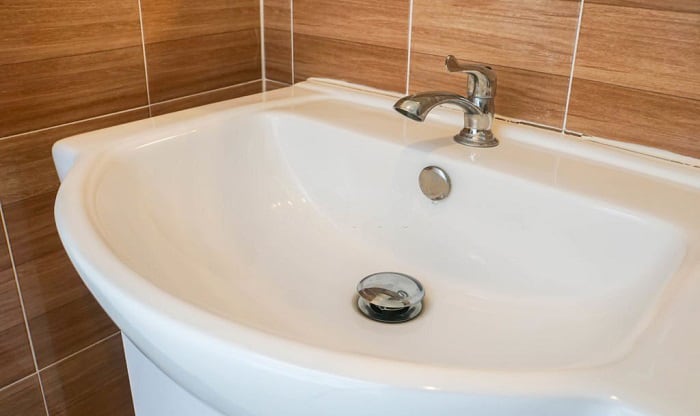
A hairline crack in the sink may seem harmless, but you shouldn’t turn a blind eye to it. The appearance of a fissure indicates that the sink’s integrity is already compromised, and further external impact can worsen the damage over time.
Fortunately, it’s not that complicated to learn how to repair a hairline crack in a porcelain sink. Check out what you can do to fix a cracked porcelain sink before the damage has a chance to spread.
Table of Contents
Porcelain Hairline Crack Repair Instruction
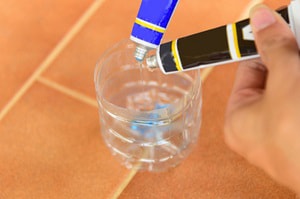
Before starting, open the window or turn on the bathroom exhaust fan. Adequate ventilation can help with the drying process and reduce the smell of the epoxy compound.
What You Need To Fix Broken Porcelain Sink
- Epoxy mixture
- All-purpose cleaner
- Acetone
- Sponge/scrubber
- A clean towel/microfiber cloth
- Hairdryer
- Air compressor
- Fine-grit (or medium-grit) sandpaper
- A pair of gloves
- High-gloss paint (optional)
- Applicator brush
Step 1: Clean And Dry The Sink
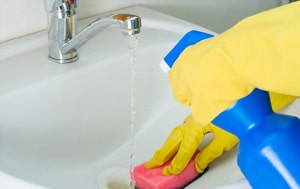
To get ready for your porcelain sink crack repair, use a clean sponge soaked with an all-purpose cleaner to clean the sink until its entire surface is spotless.
Once the sink is clean, dry it with a clean and lint-free microfiber cloth or towel. Alternatively, you can blow-dry it on a low setting.
- Avoid using too much force as you scrub – it can cause further damage.
The cracked area must be 100% dry before the next step. Otherwise, the epoxy compound might not fall out after a short while.
Step 2: Sand Down Over The Cracks
Carefully rub over the hairline cracks in ceramic sink with fine-grit (or medium-grit) sandpaper until the area becomes rough to the touch.
Ideally, the sanded portion should be coarse enough for the epoxy to stick effortlessly.
Then, utilize an air compressor or blow-dryer to blow away any dust residues. Wipe the sink again with some acetone and let it dry.
- Don’t be too rough with the sanding to avoid scratching the surrounding unaffected area.
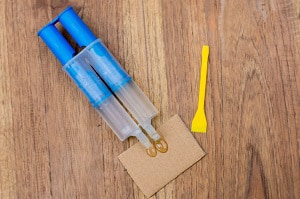
Step 3: Mix The Resin Epoxy
If your porcelain hairline crack repair kit already has a pre-mixed epoxy compound, you can skip this step.
If not, follow the kit’s manual instructions.
In case the two-part epoxy kit doesn’t come with a user guide, go for a 1:1 mixing ratio. Thoroughly blend the two ingredients with a stick.
- To repair large chip in porcelain sink you might need to prepare more epoxy.
- Wear gloves to protect your hand when stirring the epoxy compound.
- If the resulting mixture’s color doesn’t tone with your sink’s, add some matching high-gloss paint.
- Different epoxy compounds have varying setting rates, ranging from 5 to 30 minutes. Be sure you apply the mixture to the sink before it sets.
Step 4: Fill The Cracks With Resin And Repaint
Dip the applicator brush or a toothpick into the solution and gently dab it into the fissure to hide cracks in porcelain sink.
Depending on the severity of the crack, you might need to apply more than one layer. If that is the case, let the resin rest for at least 5 minutes before spreading another layer.
Refrain from filling the crack with too much epoxy at once. Go slow instead. It’ll save you the trouble of cleaning smeared areas.
After you’ve filled the crack, smooth it out with a scraper. Let the compound sit and cure for at least 3 hours. However, you should leave it alone for 24 hours.
- Insufficient resin amount won’t be able to fix the crack, but too much epoxy can result in an unsightly bump.
- Scrape the excess resin in downward motion
- The crack grain becoming visible again is a sign that you’ve scraped off too much. If this happens, you’ll need to reapply more resin.
- Set your room temperature at 68-72 °F to make sure the epoxy sets in completely.
- If possible, do not use the bathroom during these 24 hours because moisture can tamper with the adhesive.
Step 5: Sand The Repaired Area
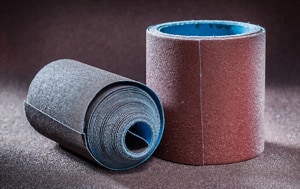
Once the mixture has set, rub the sink with coarse sandpaper in a circular motion to rid the unsightly lumps. Afterward, polish the area again with a fine-grit sandpaper.
Keep sanding the area until the repaired surface becomes smooth and even. Don’t use too much force, which can damage the sink again.
Stop every now and then to gauge whether you need to keep sanding. As soon as the surface is sufficiently smooth, stop.
Step 6: Re-apply The Glaze Layer
If you feel that your sink looks old and unattractive, maybe it’s time to re-glaze the sink.
First, clean every nook and cranny of the sink. Then, examine whether there’s any silicone caulk. If there is, get rid of it with a silicone digester.
Afterward, rinse the area with the acid paste and, subsequently, a degreaser. Use a spray primer or a paintbrush to apply epoxy primer to the sink.
It usually takes epoxy primer 30 minutes to 3 hours to dry. However, in cold and humid areas, you might need to wait overnight for it to do so.
Spray acrylic urethane onto your sink. Remember to keep the spray can far from the sink to avoid paint dripping. Once that’s done, get a caulk gun to re-seal the sink.
Why Is My Porcelain Sink Cracking?
Below are the most likely culprits that caused you to repair cracked porcelain sink.
1. External Force
In most cases, your porcelain sink cracks because of blunt force. When something heavy slams into the fragile porcelain, it’s not that strange if the sink cracked all the way through.
Likewise, when you accidentally hit the sink over and over again, a hairline fracture will form over time.
2. Chemical Reactions
Hydrochloric acid, which can be found in some cleaners for bathroom tiles or toilet bowls, will trigger a chemical reaction that results in microscopic chinks. As time goes on, the damage will worsen until it’s easily noticeable to the naked eyes.
3. Drastic Variations In Temperature
When porcelain comes into contact with cold or hot water, it will contract or expand respectively.
Normally, this phenomenon does not damage the material whatsoever. However, it’d be a different story if you immediately switched back and forth between cold and hot water.
Drastic temperature variation of more than 20 degrees will result in thermal shock, which then leads to the development of hairline cracks.
4. Improper Plumbing Installation
Excessive tightening on the plumb’s fixture is another possible reason for hairline cracks in porcelain sinks. Improper installation aside, undue pressure on the faucet or sealant can also occur when someone inexperienced attempts to fix the sink.
5. Rust
It may not look like it, but most porcelain sinks contain steel/cast iron core for enhanced integrity. As a result, repeated exposure to moisture can cause the sink to rust.
The rusting process doesn’t just corrode steel, it also makes the metal swell. The expansion might be minuscule, but it’s enough to exert pressure on the sink. Given enough time, the porcelain will crack under continuous stress.
6. Natural Causes
Nothing is impervious to the flow of time, and your sink is no exception. Even if you treat it with the utmost care, the porcelain will become weathered eventually. So, whether your sink will show hairline cracks is just a matter of time.
How to Prevent My Porcelain Sinks From Cracking?
While you can’t completely protect the sink from cracking eventually, there are many things you can do to delay the inevitable:
- Be mindful when moving heavy objects. Other than the obvious “do not drop anything heavy in the sink”, make sure large objects don’t bump into it.
- Don’t use harsh chemicals in the sink, especially those with acids. Always check whether the cleaner has hydrochloric acid before dumping it into the sink.
- Avoid radical changes in water temperature. Instead, gradually lower/raise the heat so that the porcelain has time to adapt.
- Switch to more heat-resistant materials such as stone resin or copper if scorching water is in high demand in your house.
- Let the professionals handle the plumbing system.
- Clean the sink daily to minimize moisture and mildew.
Should I Use A Porcelain Repair Kit?
Absolutely, especially if the crack is less than ⅛ inch deep. With the aid of a kit, you’ll find it much easier to do bathroom sink crack repair.
Nonetheless, when the damage is more severe, such as the sink cracked all the way through, it’s better to leave the job to the professional.
Conclusion
Now that you’ve learned how to repair a hairline crack in a porcelain sink. It’s time to get down to business. Make sure to follow the steps above and pay extra attention to the notes and tips along the way.
Good luck with your task and feel free to share this guide with others.
Before you go, don’t forget to check other bathroom tips:

Hi, I am Roseanne Jones, an aspiring home designer that wants to make you feel more at home with your new house.With nearly five years of redecorating old residents and arranging new ones, I am confident that I can give you the best advice on your lovely place.