Is your old recessed light housing outdated, damaged, or no longer functioning properly? You may be currently renovating your home and need to remove recessed lighting to install newer, sleeker models.
Whatever your reason may be, it can be a daunting task if you’re not familiar with the steps involved.
Learn how to remove old recessed light housing with this step-by-step guide. We’ll provide you with all the necessary information to complete the task.
Also, some tips are added for removing a new-construction recessed light without attic access. Keep reading!
Table of Contents
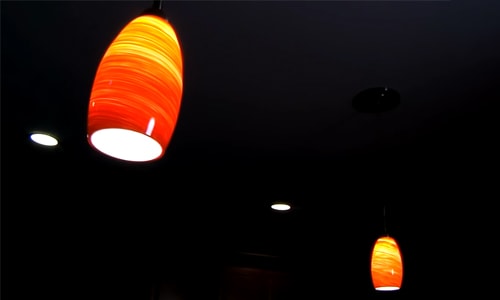
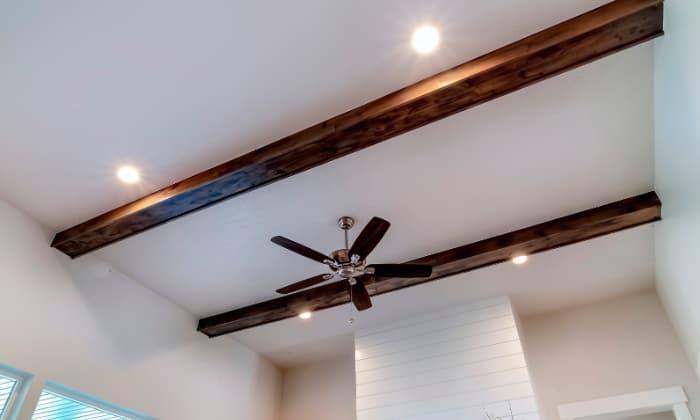
About Recessed Lighting
If you plan to get rid of recessed lighting, it is crucial to know what type of lighting you have and its components, as this will affect the installation and removal process.
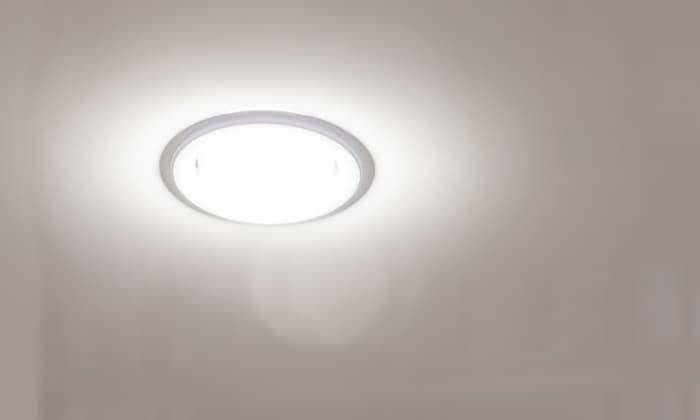
Recessed lighting, also known as can light or downlight, is a type of lighting fixture that may be installed flush with ceilings, walls, and other surfaces.
The skeletal overview of recessed lighting is the following:
3 Main components
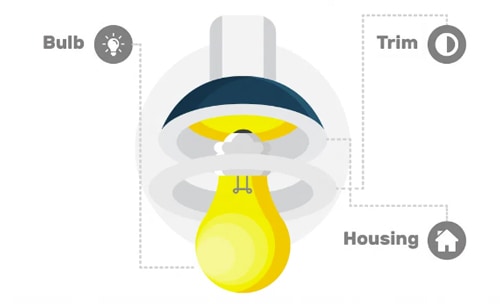
- Housing is the hidden casing that houses the connections and bulb.
- Trim is the casing that lays flat on the ceiling. It includes trim rings, a light cover, and a canopy.
- The bulb is the object that emits light when connected to current.
Types of Recessed Light Housing
- New-construction housing
These are light fixtures that are installed in new homes or buildings during the construction phase before the ceiling drywall is added.
The pre-installed recessed light fixtures design of these lights provides a functional lighting solution and adds a modern and sophisticated touch to any interior space.
- Remodel Housing
These old recessed lighting cans are the recessed lighting placed in an already existing ceiling drywall.
Step-by-step Guides to Remove Old Recessed Light Housing
Removing old fixtures like old square recessed lighting is essential for both safety and aesthetic reasons. They may become loose or damaged over time, creating a potential fire hazard.
Furthermore, they may not be energy-efficient, which could lead to higher electricity bills.
On top of safety concerns, changing old fixtures with canless recessed lights also elevates the aesthetic beauty of your home, giving it a fresh new look.
New fixtures with flush-mount lighting are available in an array of styles and colors, making it easy to find one that complements the interior design of any home. It provides a more aesthetically pleasing lighting solution that enhances the overall space ambiance.
So we have researched the following guides to remove recessed light fixtures from the ceiling:
What to Prepare
Before attempting any electrical work, it’s crucial to have the right tools and materials on hand. Here is a list of what you need for recessed lighting removal:
- Screwdriver
- Pliers
- Voltage tester
- Ladder
- Gloves
- Safety glasses
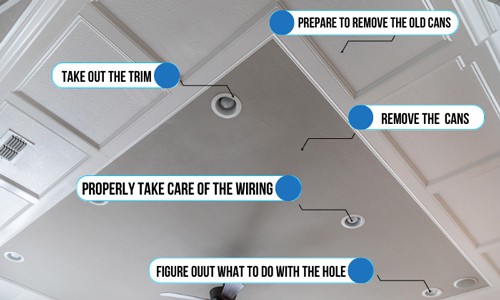
Step 1: Initial Preparation for Removing Old Cans
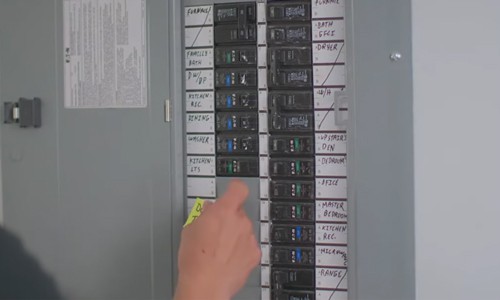
- Turn off the power supply before removing a recessed light to avoid any risk of electrocution. Locate the circuit breaker or fuse box and switch off the corresponding circuit that powers the light fixture.
You can test if the power is off by turning on the light switch or a nearby switch that shares the same circuit, or use a voltage tester. If no electricity flows, it’s safe to proceed.
- Always wear appropriate protective gear, like gloves and safety goggles, when dealing with electrical fixtures. It is crucial to avoid touching any wiring or electrical components before checking if they have power running through them. This will prevent electrical shock and possible injury or death.
- Having an assistant with you when removing old recessed lights can be helpful as they can hold the ladder steady or pass your tools while you work. It allows you to focus on the task at hand without any added difficulties.
- Keep in mind that if you encounter wiring issues or difficulties while handling this process, it is best to leave it to the professionals. They possess the expertise to handle such tasks safely and effectively.
Step 2: Take-off the Bulb
After turning off the power supply, make sure the bulb is not hot. Otherwise, use hand gloves to protect your hands from heat emitted by the bulb when removing existing bulbs from the light fixture.
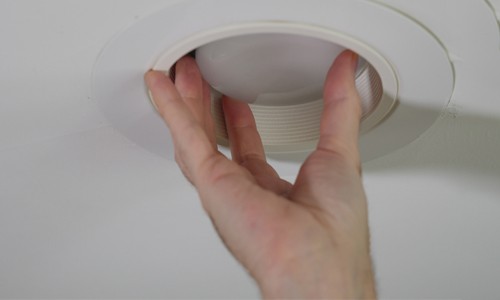
Step 3: Take the Trim Fixtures Out
Remove old recessed light trims by loosening the trim rings. Use a flathead screwdriver or your fingers to pry off the ring surrounding your recessed lighting fixture.
By the way, there are different types of recessed lighting trim which makes their mounting different also.
- In some models, trims are connected to the can housing by recessed lighting spring clips which you need to reach from the inner part of the trim and pull out from its slot using your hand or pliers.
- Other trims that can work with LED recessed light options have two V-shape wires on opposite sides. This can be squeezed together and pulled so that the trim pieces come out.
- There is also ultra-thin exterior lighting where the bulb and trim come in one. These fixtures are installed flush with the ceiling using springs positioned on opposite sides of the trim.
Step 4: Remove the Can

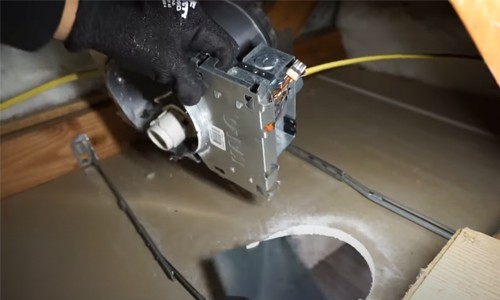
New Construction Recessed Lighting
Removing new-construction recessed lights can be quite a task, especially when there is no access to the attic.
- You might need to disturb the ceiling drywall, which requires heavy-duty tools. Typically, the new construction-type cans are held by brackets in place.
Hence, the most suitable solution to take it out is to remove a square-shaped section of the ceiling’s drywall that is big enough to reach the light’s structure. This could be done using a jab, jig, or reciprocating saw.
- Then, using a screwdriver, remove the nails that fasten the recessed light bar hangers to the joists.
- As soon as the bars are loosened, remove the light can housing and detach the wires in the junction box.
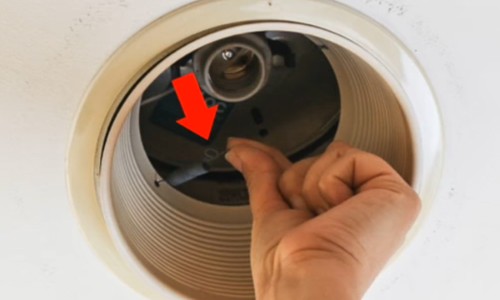
Remodeled Lighting
Remodeled types of light housing are much easier to remove.
- To begin, use pliers to loosen the wing-nut of the screws securing the bracket that holds the socket on the sides of the can housing.
- Then, you can easily remove it by hand.
- There are also 4 screws pinning the can housing near the opening. Take these off using a screwdriver.
- Now, remove the can light housing from the ceiling by pushing it up or pulling it down until it loosens up, and the housing can be detached from the ceiling.
Step 5: Properly Take Care of the Wiring
When you already remove the recessed light, you can see the junction box where the wiring connections are safely coiled.
Carefully detach each wire one at a time; make a note of their arrangement before disconnecting them to ensure correct reconnection later.
Once the wires are detached, you can remove the old fixture from the ceiling. Take note of its size, shape, and type for future reference when considering replacement options.
Meanwhile, cover the tip of the main wires when you do not have any plan yet.
Step 6: Figure Out What to Do With the Hole
When your sole purpose in removing an old fixture is to change it with a new one, it could be an easy task since the size fits exactly on the ceiling’s hole.
However, when you remove a 4-inch recessed light and want to change it to something bigger, like a 6-inch recessed light, you might need to cut a bigger hole in the ceiling to accommodate the size.
You may also change it with an energy-efficient LED halo recessed light housing or place an electric fan for summer-ready ambiance. You have complete freedom in how to deal with the opening.
Tips to Remove a New-Construction Recessed Light Without Attic Access
In new-construction homes, it is common for builders to install recessed lights directly into the ceiling joists. This means the fixtures are attached from above and require access from the attic space to remove them.
However, many homes do not have attic access or have limited access, making it difficult to remove ceiling light housing.
Hence, it can be a challenge for homeowners who want to change recessed lights with more energy-efficient LED lights or simply want an updated look.
Fortunately, there are several tips you can adapt to replace these fixtures without having access from above. Here are some of the tips for removing new construction recessed light without attic access:
- To avoid electrical shock or accidents, ensure that the recessed lights are disconnected from the power source before starting.
- Be extra cautious when removing light fixtures and glass covers as they are fragile and can easily break, which can result in damage or injury.
- Use a voltage tester to check that there is no electric current running through the wire from the main switch to the junction box before you detach it.
- If you plan to replace multiple lights in your unfinished attic, start by removing or trimming the surrounding insulation.
- If you don’t feel confident dealing with electrical wires, it’s wise to seek the help of a skilled or certified electrician. Trying to handle these components on your own can be hazardous and lead to potential problems, so don’t hesitate to reach out to a professional for assistance.
Conclusion
There are different reasons why homeowners want to remove old recessed housing. It may either be for aesthetics, safety, or an upgrade purpose. Knowing the basic steps on how to remove old recessed light housing is a valuable skill to boost your DIY skills.
Taking out recessed lighting by yourself is a smart move. It leads to personal growth and increased financial independence since you won’t have to pay someone else to do it.
Also, it is reiterated to always remember safety precautions whenever you’re working with indoor or outdoor recessed light housing to avoid unwanted accidents.

Hi, I am Roseanne Jones, an aspiring home designer that wants to make you feel more at home with your new house.With nearly five years of redecorating old residents and arranging new ones, I am confident that I can give you the best advice on your lovely place.