Tiny but mighty, nails actually have a big say in whether hardwood installation will be a resounding success. Sometimes, a wrong choice of the nail does not just simply end in a failed project—it could even damage your floor planks to split.
So, what type and size of nails for hardwood flooring should you use? Well, it all boils down to your floor planks’ type and thickness. In some cases, the subfloor can influence the choice of nails too.
Without further ado, let’s check out what’s the best hardwood flooring nails for you.

Table of Contents
Best Nail Types for Hardwood Flooring and Their Dimensions
In general, there are five different types of wood nails. Each nail kind is available in various sizes and gauges to accommodate different wood varieties and thicknesses.
1. Cleat Nails
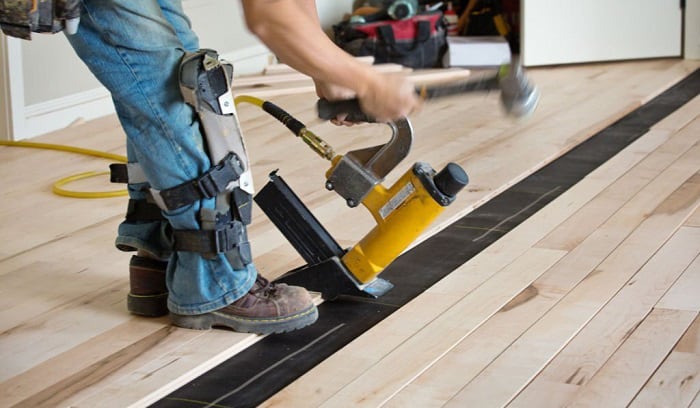
Cleat nails are made from steel, quick to install, and suitable for all flooring, including delicate ones like engineered planks. A hardwood nailer is necessary to drive cleats into the floor, ensuring the penetration won’t hurt the surface like a hammer.
You’ll notice the cleat nail has a barbed edge along ⅔ of its entire length. This design is to ensure that the nail is locked tightly in place with the subfloor. Meanwhile, the smooth end gives the floor room for adjustment when there’s a change in temperature and humidity.
These fasteners’ heads are either T-shaped or L-shaped. These two types are functionally the same; the only difference is that they’re suitable for different nailer models.
Available in 16 and 18 gauge, this type of nails for hardwood flooring has three sizes:
- 1 ½ inch: for ½-inch flooring or thinner.
- 1 ¾ inch: for ¾-inch solid wood planks with a concrete sub-flooring.
- 2 inches: for ¾-inch solid wood planks with a wood sub-flooring and floor joints. Also applicable for ¾-inch flooring installed over ½-inch plywood and a concrete underfloor.
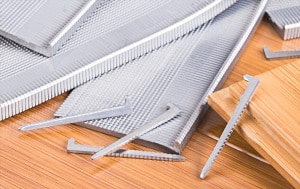
2. Staples

Similar to cleats, staples are made from steel..
- However, a box of staples can cost only half as much as that of cleats.Their drastically simpler design means that staples can be manufactured at a faster rate, resulting in a lower price.
- Flooring staples are effortless to install, with some going as far as saying they’re more straightforward than cleats. Nonetheless, you’ll still need a pneumatic stapler to stamp these two-prong fasteners onto your floor.
- Another advantage of staples is that they boast a stronger initial grip than cleats. Unfortunately, they are also more prone to splitting the plank’s tongue, specially engineered flooring with a plywood base.
The potential problem of staples doesn’t just stop there. Seasonal changes can cause the staples to loosen from the wood, leading to squeaky noises.
Due to these setbacks, it can be hard to decide between nails or staples for hardwood floors.
Personally, I’d pick staples if I’m installing oak floors. However, you can also check what recommendations the flooring manufacturer offers to know whether you should use nails or staples for hardwood floors.
Here are three main flooring staples sizes you can find them in and their respective application:
- 1 inch to 1 ¼ inch: for ¼-inch to 5/16-inch floors
- 1 ¼ inch to 1 ½ inch: for ⅜-inch and ½-inch floors
- 1 ½ inch: for ⅝-inch floor
3. Specialty Rosehead Nails
Originating from the mid-18th century, rosehead nails are a popular cut nail type besides square ones. Although they’re now made by machines, they still boast the same rustic hand-forged look as back in the day.
These nail heads’ appearance usually varies depending on the manufacturer. Though the design may change, this type of nails for hardwood flooring excels at accentuating floors’ aesthetic by lending them vintage notes.
- Rosehead cut nails are best for face-nailing natural and softer woods like pine because the head design ensures the nail won’t pull through. Keep in mind that these fasteners require pre-drill holes. Otherwise, they might split the wood.
- This cut nail profile arrives in many sizes, ranging from ⅝ inch to 4 inches. Rosehead nails with common wood floor fastener lengths such as 1”, 2”, 2 ½”, or 3” are pretty easy to come across.
4. Square-cut Nails

As square-cut nails belong to the same category as rosehead ones, it’s reasonable that they also demand pre-drill holes. However, there’s another catch—they need to be installed by a cut-nail expert to prevent complications.
People use square-cut nails for face nailing hardwood flooring because they’re less likely to pull through. These are fantastic at keeping wide-plank floorboards in place.
One advantage face-nailing has over blind nailing is that it’d be impossible for the board to cup in the center. Therefore, you can just square-cut nails to lend a decorative note to your floor while keeping it perfectly even.
Below are two common square-cut nail sizes and how to use them:
- 1 ½ inch: for ½-inch flooring
- 1 ¾ inch: for ¾-inch flooring
5. Finishing Nails

Boards along the walls usually require face-nailing with finishing nails. Due to their slim design, these nails can easily be driven through the plank and the subfloor. In addition, their minimal head allows for effortless wood putty application afterward.
The ideal size finish nails for a hardwood floor is 8D (or 8 penny head). This stems from the penny system, with “D’ referring to the Roman coin Denarius. In this system, an 8D nail would have a 2.5-inch shank.
As with other nails for face nailing hardwood flooring, these fasteners call for pre-drill holes to prevent splitting. Afterward, you can use a pneumatic nailer to finish the job at a faster pace.
FAQs

1. How Long Should Nails Be For Hardwood Floors?
This depends on how thick your hardwood floor is. A ½” floor, for example, should be kept in place with a 1 ½” nail.
Similarly, size nails for ¾ hardwood flooring should be 1 ¾ inch long. If this floor has an additional ½” plywood underneath, switch to a 2” option.
With that being said, many other factors come into play. Therefore, your best bet is to check with the flooring manufacturer.
2. How Far Apart Should Nails Be When Installing A Hardwood Floor?
The requirement for the space between flooring nails for standard 3 ¼ hardwood is 8-10 inches.
Reduce the in-between space to 6 inches for wider floorboards and increase the range to 10 inches if you’re installing narrow planks.
3. What Gauge Should I Use For Hardwood Floor?
The two main types of gauge nails for hardwood flooring are 16 and 18 gauge, with a higher number indicating a thinner nail profile.
Normally, you’ll need to pick the nail gauge based on how thick and hard the wood is. However, it’s also important to consider whether the plank is solid or engineered. For this reason, it’s best to use the gauge the manufacturer recommends.
If there’s no clear indication from the manufacturer on which type you should use, 16 gauge is the safest bet. Due to its superior holding power and versatility, it can handle any flooring type, including thicker ones.
4. What Kind Of Nailer Is Suitable For Hardwood Floor?
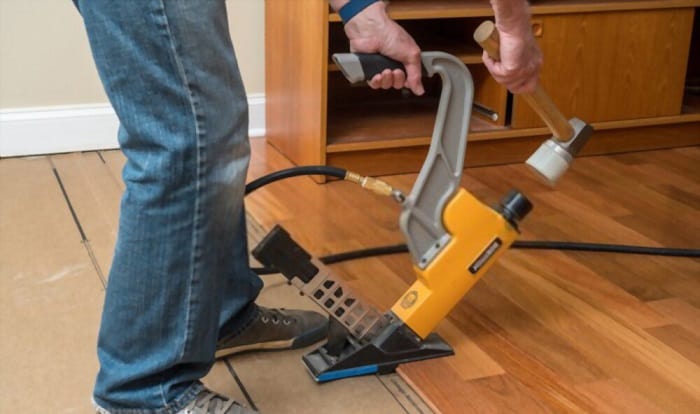
The three main types of nail guns for hardwood floors include flooring nailers, mallet nailers, and finish nailers.
A pneumatic flooring nailer is designed to drive nails through the floor’s tongue and into the subfloor. This nail gun makes installation easy even for beginners, as it can minimize the chances of mistakes.
Mallet nailers are entirely manual. However, it is functionally the same as pneumatic nailers.
Lastly, a finish nailer’s use is limited to only shooting finishing nails without damage to the wood floor.
5. Can I Install Hardwood Floor With A Brad Nailer?
Whether this is possible comes down to the plank’s thickness and the wood type.
For ½-inch engineered hardwood, you can use an 18G Brad nailer to install your floor. However, this type will not be enough to drive through a solid hardwood flooring with a thickness of more than ¾ inch.
Also, you should only use Brad nailers for planks near the walls, not the entire floor. Instead, opt for other options with enough holding power to keep the floors in place.
Conclusion
Choosing the correct type and size of nails for hardwood flooring can be tricky at first. Considering how one mistake can cost you your floor, I understand how daunting it can be to pick nail type, length, and gauge.
However, after this article, I’m sure you’ve already known what the best choice for your flooring is. Remember, always pay attention to your floor’s type, thickness, subfloor, and the aesthetics you’re going for.

Hi, I am Roseanne Jones, an aspiring home designer that wants to make you feel more at home with your new house.With nearly five years of redecorating old residents and arranging new ones, I am confident that I can give you the best advice on your lovely place.